
Shopify Integration
Sartre Email includes a Shopify integration, which you can use for custom designed email notifications for your Shopify store.
We have included templates for all 17 Shopify notification emails.
Required software
Because Shopify only allows editing notification templates by pasting in your email's HTML code, you will need a text editor first. We recommend Sublime Text or Atom.
Uploading to Shopify
Inside the Files/shopify/ folder, you'll find HTML files for all Shopify notification emails. Read more about them below ↓
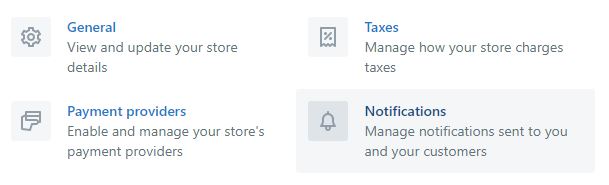
- In your Shopify admin, click Settings on the bottom left.
On the next page, select "Notifications" :
Next, you will be presented with a list of all types of notification emails Shopify sends.
To edit a Notification, click its name in the list on the right-hand side:
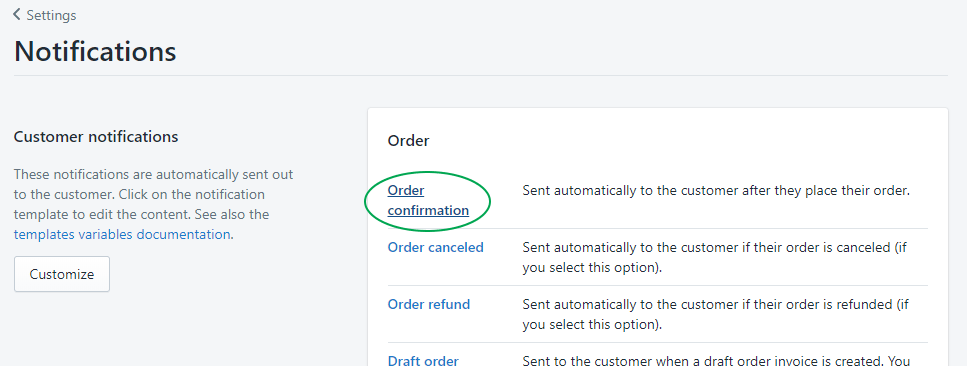
You will then see a form where you can set the Email Subject and, what we're after here, the Email body (HTML).
- Now open the corresponding HTML file from our template in the text editor of your choice.
- Select all code with Ctrl + A (Windows) or Cmd + A (Mac). Copy it to clipboard with Ctrl + C / Cmd + C
- Go back to your Shopify admin, and paste the code you just copied, in the Email body (HTML) area.
- Finally, click Save on the bottom right.
The new template will now be used for emails of that type that Shopify sends for your store. If you want, you can test the template with real data from your store, by clicking "Send test email" or "Preview" at the top of this template editing page.
Supported Tags
Our templates use all the tags and contain all the information that the default Shopify templates offer. In some cases, even more. There are many Liquid tags being used, so it's not practical to list them here. Instead, please have a look at the screenshots on the product's landing page.
Related: see the Liquid language reference.
Customisation
There are several types of customisations you'll want to do. Let's go through each one.
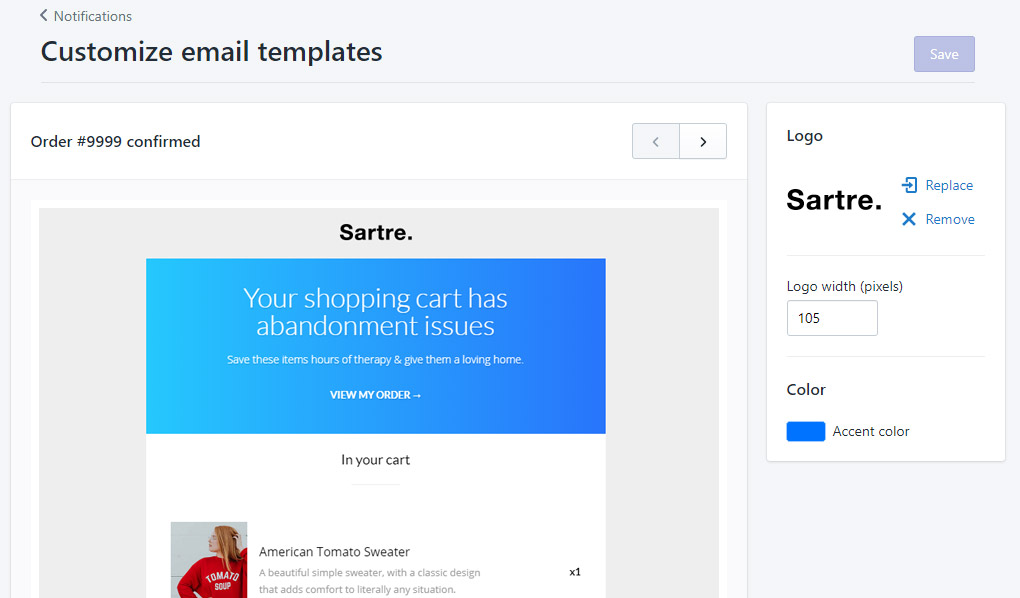
Global notification styling
Shopify has a few settings for your notification emails. You can:
- set an email logo image
- define the width of this image
- set an email accent colour
Our templates support all of these settings:
Text Editing
This involves only customising the wording in the notification templates. Maybe you don't like our default text, or maybe you need it translated for your business.
At the very top of the code for almost all emails, you will see some Liquid tags wrapping some text. Liquid is Shopify's templating language, and it is used to integrate custom websites and, well, email templates with their platform. While text editing is straightforward, the Liquid tags require a basic understanding of this language (or at least some basic experience with programming, as it uses universal concepts).
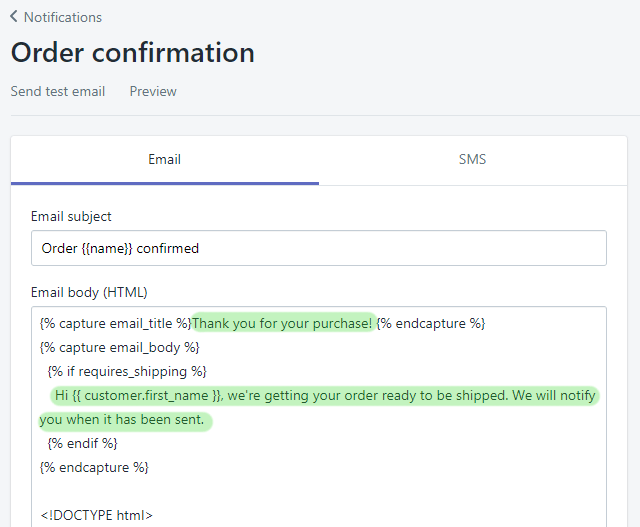
We have tried providing some defaults in this location, so that you can see them immediately and change them there without scrolling down and hunting for text in the HTML. However, this isn't possible with all components, so you will need to edit wording inside the HTML, too. Which brings us to:
HTML / Liquid editing
Since Shopify doesn't provide a visual editor for editing your notification templates, you will need to edit the source code of our templates, in order to do advanced customisations.
We recommend using a text editor capable of syntax highlighting for doing this (both Sublime and Atom have it), as it will be easier for you to find what you're looking for. Shopify doesn't provide such editing capabilities.
Note
Editing the HTML source code is currently needed for some parts of the template, such as call to action button labels. Simply do a search (Ctrl/Cmd + F) for the text string you're looking to change, and the text editor will jump to it and highlight it.
If you want to change what product information is being pulled into the template from your store, you must have experience with Shopify's Liquid language.
Google Fonts editing
While our default font pairing looks good, you might want to use different Google Fonts for your brand.
Unfortunately, because Shopify requires a complex workaround to enable web fonts in notification emails, changing them is not as easy as it is with the template's other versions. You'll need to go through a few steps.
In Google Fonts, search for the font that you'd like to use
Select it, and a small black bar will appear at the bottom of the screen. Click the bar to open it:
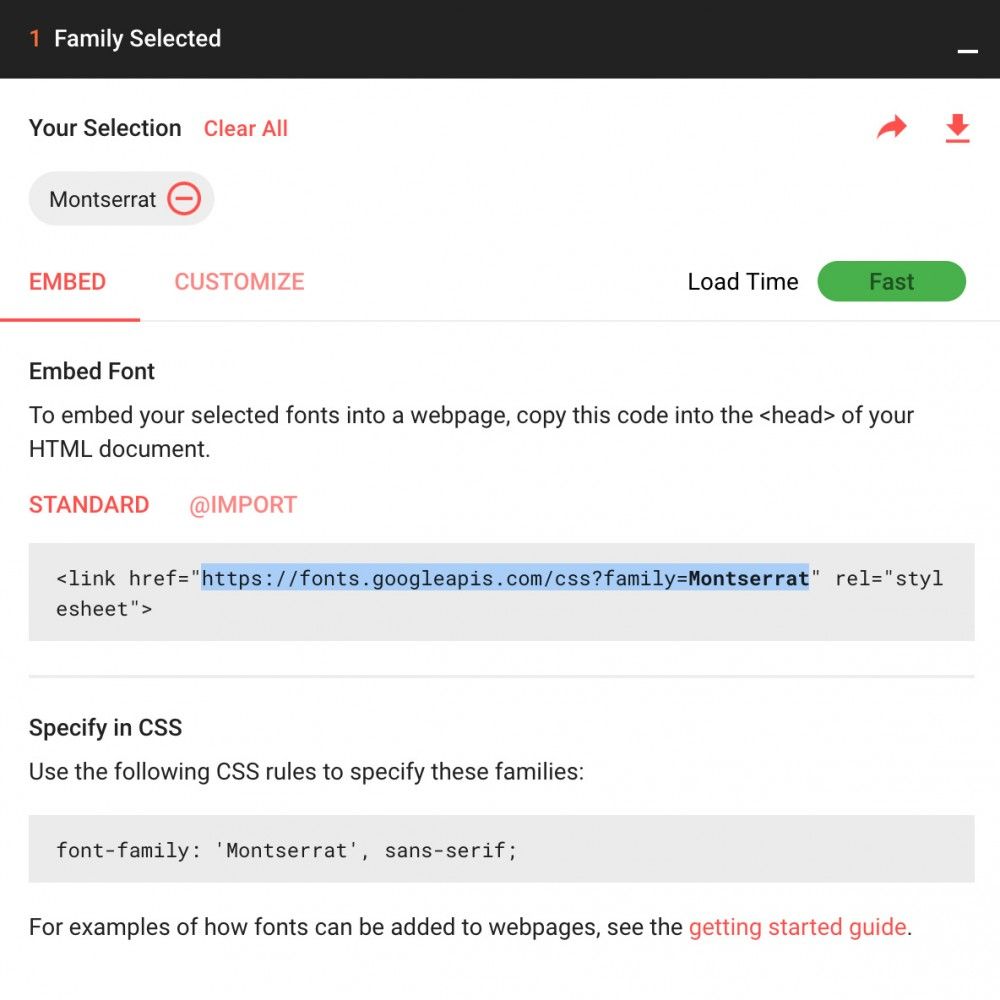
Copy the web font URL ( as highlighted above), open a new tab in your browser, paste the URL in and hit Enter. You'll most likely see a list of many @font-face declarations, each looking something like this:
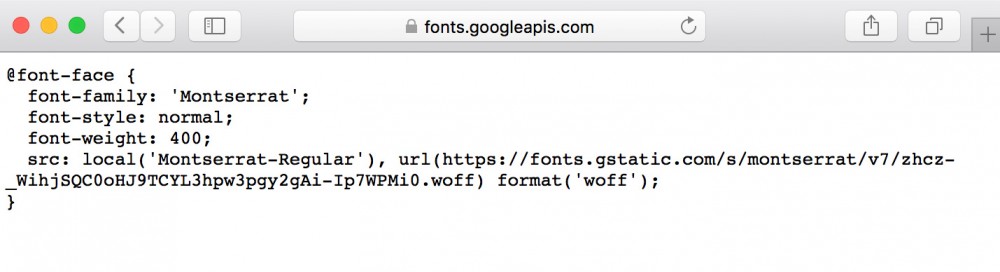
Now, if you take a closer look, you'll notice that this block is very similar to what we have in the template. Each @font-face block imports a specific font version, and its name is defined in that font-family: '' code.
- Copy the @font-face block you need - there will most likely be many of them, for different character encodings. Only choose one encoding - the one that you need - as the more you use, the more it impacts the email load time.
- Open up the notification template you want to change the fonts for, in your preferred text editor
Immediately inside the
<style>tag, you'll see something like:@media only screen and (min-width: 1px) { @font-face { ... } @font-face { ... } ... }- Replace the @font-face block that corresponds in font-weight with the one you just copied, by deleting it and pasting from clipboard. Do this for all weights of the same font that you need.
Finally, after the last @font-face, you will see this:
.col, td, th, div, p {font-family: "Open Sans",-apple-system,system-ui,BlinkMacSystemFont,"Segoe UI","Roboto","Helvetica Neue",Arial,sans-serif;}
.webfont {font-family: "Lato",-apple-system,system-ui,BlinkMacSystemFont,"Segoe UI","Roboto","Helvetica Neue",Arial,sans-serif;}
Change the first font name in font-family: '', by using the same name that is defined in the @font-face block.
Do not change the webfont class name, as this is used throughout the template.
That's it! All that's needed now is to replace the template in you Shopify Notifications settings as explained above ↑.
Make sure to test the email in the Shopify admin, in order to make sure your changes have been correctly applied.
Structure
Shopify templates can be found in the Files/shopify folder. There are 17 HTML files in total, each named exactly after the corresponding notification template in Shopify. The following tables list the templates in the same order listed in your Shopify Notifications Settings.
Customer notifications
These notifications are automatically sent out to the customer.
Orders | |
| order_confirmation.html | Sent automatically to the customer after they place their order. |
| order_cancelled.html | Sent automatically to the customer if their order is canceled (if you select this option). |
| order_refund.html | Sent automatically to the customer if their order is refunded (if you select this option). |
| draft_order_invoice.html | Sent to the customer when a draft order invoice is created. You can edit this email invoice before you send it. |
| buy_online_for_Shopify_POS.html | Sent to the customer when their order will be completed without the help of store staff. You can email a draft order to the customer using Shopify POS for iPad. |
| abandoned_checkout.html | Sent to the customer if they leave checkout before they buy the items in their cart. Configure options in checkout settings. |
Shipping | |
| fulfillment_request.html | Sent automatically to a third-party fulfillment service provider when order items are fulfilled. |
| shipping_confirmation.html | Sent automatically to the customer when their order is fulfilled (if you select this option). |
| shipping_update.html | Sent automatically to the customer if their fulfilled order’s tracking number is updated (if you select this option). |
| shipment_out_for_delivery.html | Sent automatically to the customer after the status of their fulfillment changes to out for delivery. |
| shipment_delivered.html | Sent automatically to the customer after the status of their fulfillment changes to delivered. |
Customer | |
| customer_account_invite.html | Sent to the customer with account activation instructions. You can edit this email before you send it. |
| customer_account_welcome.html | Sent automatically to the customer when they complete their account activation. |
| customer_account_password_reset.html | Sent automatically to the customer when they ask to reset their accounts password. |
| contact_customer.html | Sent to the customer when you contact them from the orders or customers page. You can edit this email before you send it. |
Order notifications
These notifications are sent to order notification subscribers (i.e. shop owner) whenever a new order comes in.
Template | Description |
| new_order.html | Sent to order notification subscribers when a customer places an order. |
| new_order_mobile.html | Sent to mobile notification subscribers when a customer places an order. |